Getting started
Download AIMS Desktop
AIMS Desktop can be downloaded from https://desktop.aims.ac.za/download.
AIMS Desktop is a large download (over 3GB), if you’re reading this from a mobile connection, you might want to download it on a broadband connection instead.
Preparation
AIMS Desktop installs a new operating system to your computer. It can be installed alongside an existing system such as Microsoft Windows, Apple macOS, BSD or another GNU/Linux system.
Installation Media:
You will need a USB disk that is at least 4GB large. Preparing it as an installation disk for AIMS desktop will overwrite all the data that’s on there, so if you have important files on that USB disk, you should move it to a safer location before writing the installer to disk.
If you’re familiar with the dd command, you can use that from your Linux or macOS system to write the command directly to a raw USB device.
If you’re using Windows and don’t have access to a Linux device, you can download the Rufus USB tool at https://rufus.akeo.ie/ which makes writing USB disks from Windows really easy and that tool has been confirmed to work with AIMS Desktop media.
Prepare your system:
The AIMS installer will do most of the work, however, here are some tips:
Back up your system. Even though there is a very small risk of data loss, it’s recommended that you make a full backup of your system before installing. The installer in AIMS Desktop is widely used and tested, but making a backup will also protect you against human error.
Disable secure boot. AIMS Desktop doesn’t yet support secure boot. If your laptop has this enabled, you should disable it in the firmware before commencing installation. You will have to consult the manual for your laptop or do an internet search for how to do this on your machine.
Ensure you have enough power. AIMS Desktop will take some time to install. If you’re using a laptop computer, ensure that you are connected to a power source.
Installation
For the most part, the installation of AIMS Desktop is very simple. It uses a graphical installation tool called Calamares (https://calamares.io) which guides you through the entire installation process.
One aspect to be mindful though, especially if you’re dual-booting, is to be aware of the boot method that your computer uses. Newer computers use UEFI, while older computers use BIOS/Legacy boot mode.
We’ve made it really easy to identify which method your computer uses to boot up. When you start the AIMS Desktop live USB disk, it will show you the boot method in brackets.
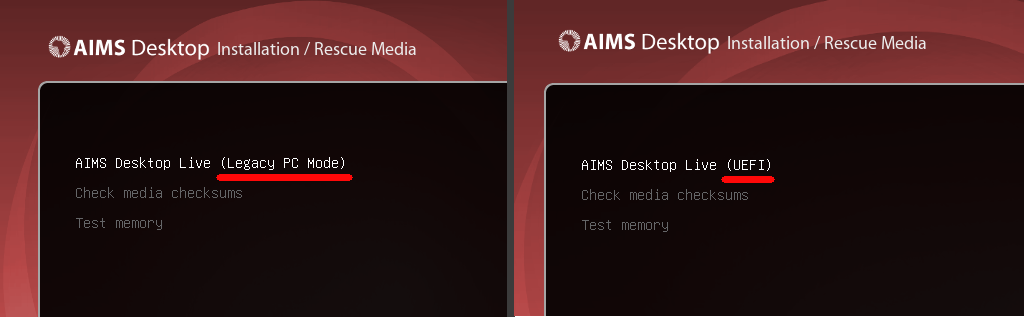 Booting in Legacy/BIOS mode to the left, booting UEFI mode to the right. The red underline has been added to these images for emphasis.
When you press enter on either boot mode, it will start loading the live environment, and you should see a loading screen similar to the one below. Startup will take a few seconds to a few minuted depending on what kind of computer you have.
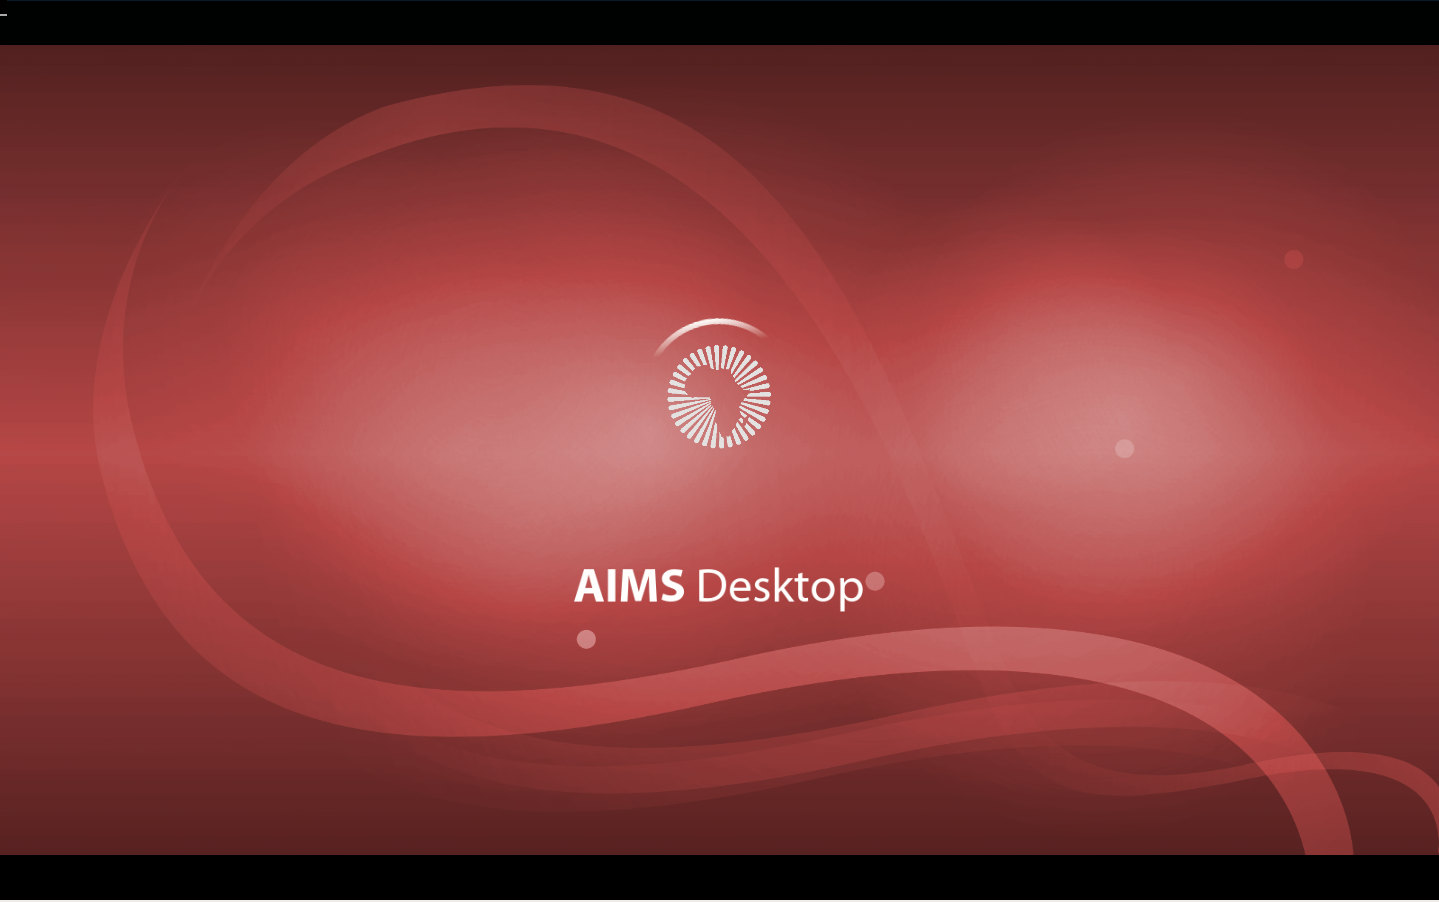 AIMS Desktop startup screen
When it has finished booted up, you will be presented with the AIMS Desktop Live environment. The live environment can do a lot more than just install AIMS Desktop, you can also use it to test whether hardware supports the system, try out the software on AIMS Desktop, or show it to a friend.
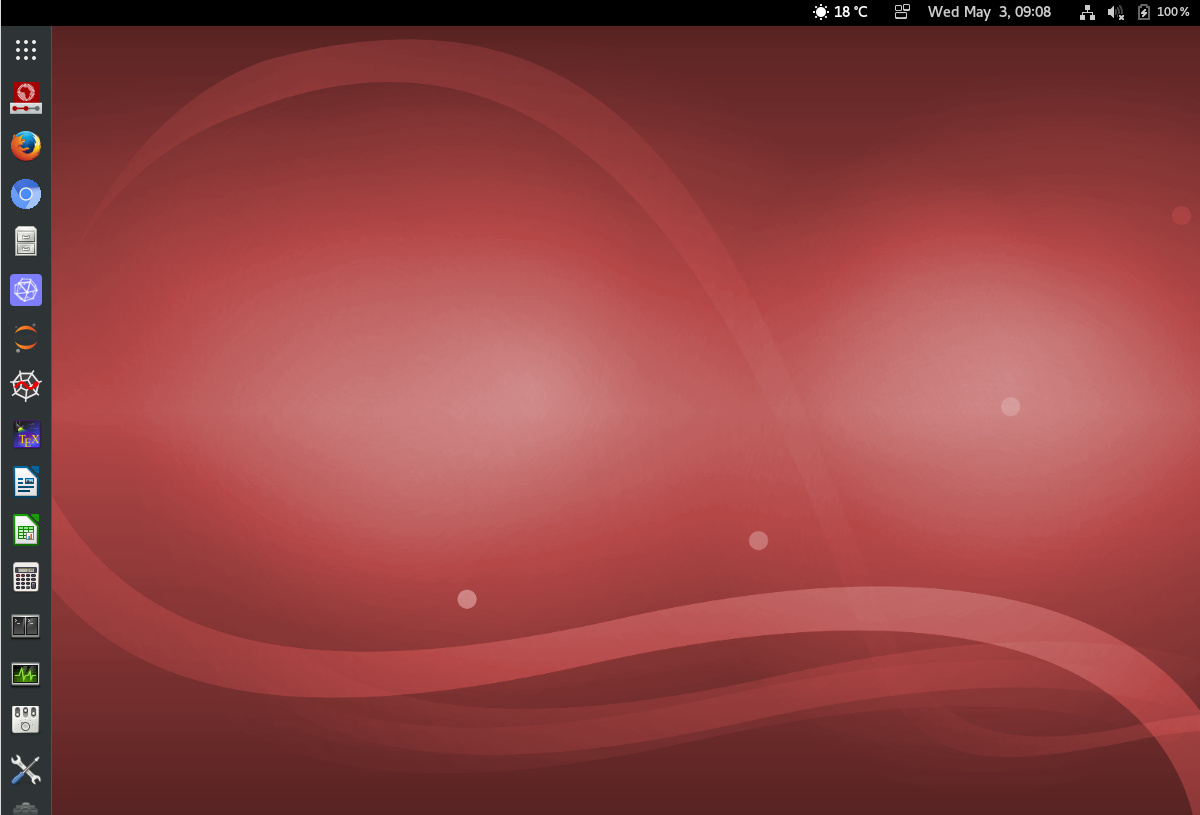 AIMS Live Desktop
The installer icon is the first one after the main menu button on the top left side, as highlighed below. Click on this button if you’d like to proceed installing AIMS Desktop.
![]() Installer button, as highlighted above
Installer button, as highlighted above
You will then be greeted by the installer. If you’re unsure about some options like region, keyboard layout, etc, then you can change it again in the settings manager after installation.
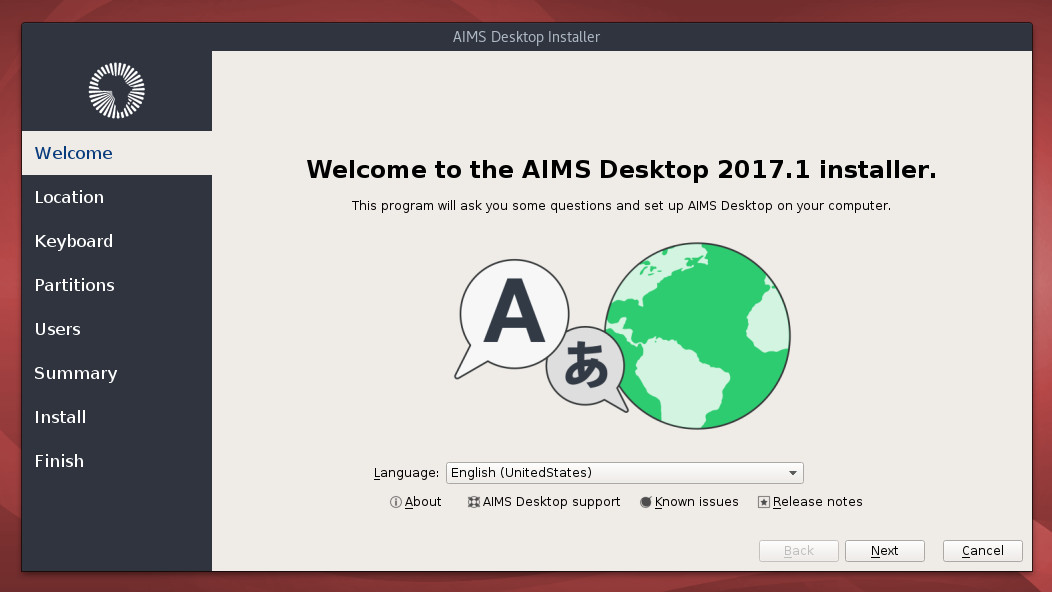 Installer welcome screen
Select the language that you would like to use during the installation, then click on next.
Then, choose your location and timezone. The city that designates your timezone might not be the actualy city you’re in, and is often the capital of your country.
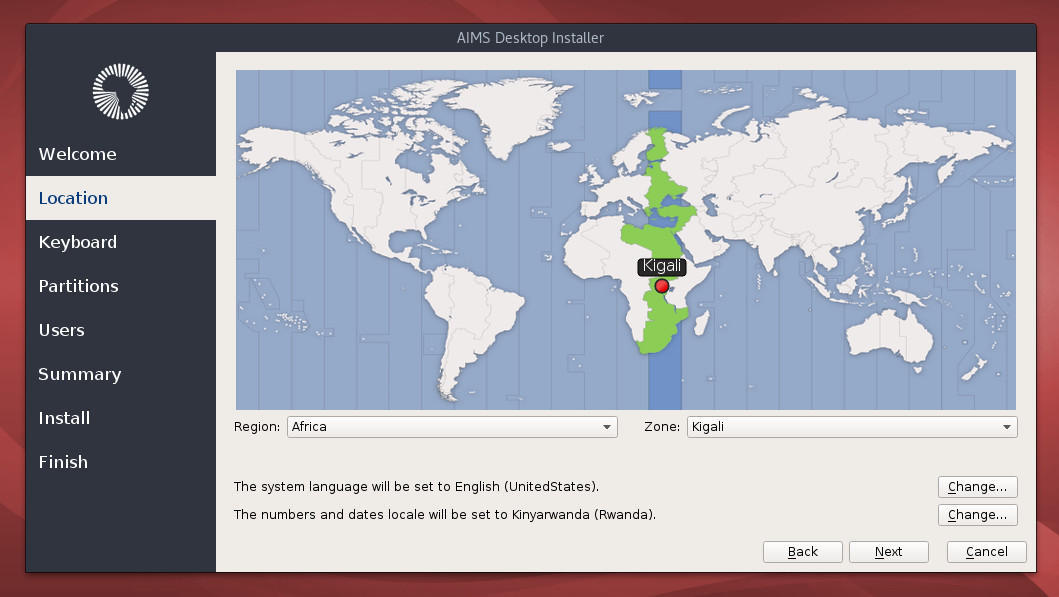 Time zone settings
Next, we’ll select a keyboard layout. Normall, you’ll want to select a keyboard layout that closest match your physical keyboard layout. In some cases, you might want a different layout to match another computer you’re using. The keyboard image in this screen will adapt so that you have a preview of the option you have chosen, and you can also type test it in the typing space at the bottom.
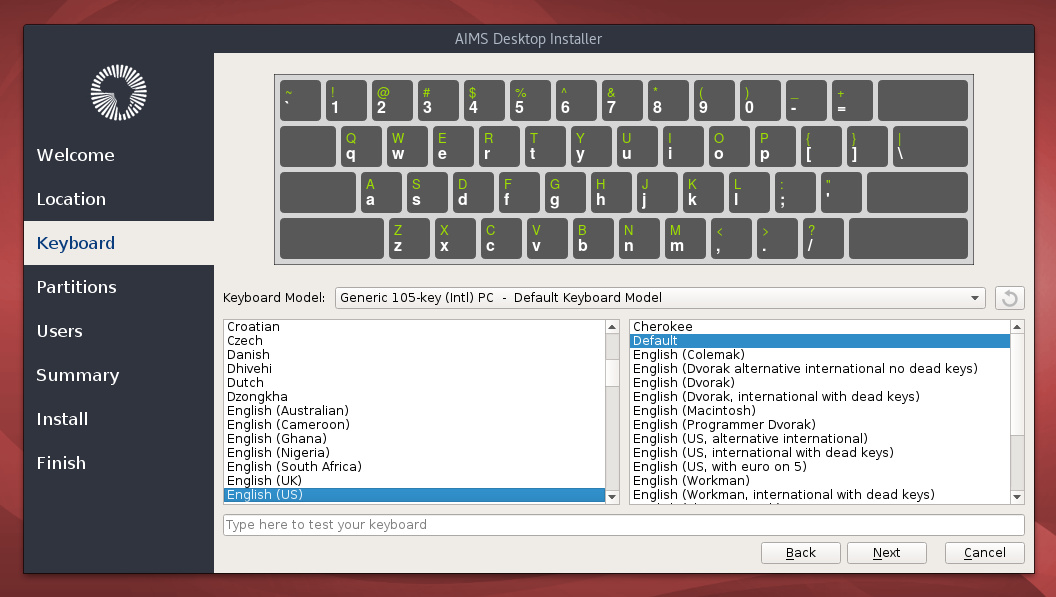 Keyboard settings
Next, we have to allocate some space to install AIMS desktop to. The most basic method of installation is to use the entire disk for AIMS Desktop. To do that, you can choose the “Erase disk” option.
If you have another system installed, you can also choose to resize that system to make space for AIMS Desktop, or to replace an existing partition with AIMS Desktop. To resize, click on an existing partition and then drag the section below to choose it’s new size.
We’re planning to add an advanced partitioning section to this guide in the future, in the meantime, feel free to ask for guidance on the aims-tech mailing list if you get stuck.
 Partitioning screen
In the next step, we’ll configure your first user for this system. This user will also be an administrator user.
- Full name: You can enter your full name or part of your name in this field.
- User name: The user name must not start with a capital letter, can not contain numbers, spaces or other special characters. Examples of user names are
mohammed,yasmine,sarah,mehdi. - Computer name: This is a name that you can use to identify the computer. It must also be lowercase alphabetical characters, but you can also use a dash, eg:
mohammed-pc,sarah-laptop,yasmine-macbook,mehdi-x280. - Password: Your password protects access to the computer. Use a password that won’t be easy to guess. A password such as
passwordorlatitudeor anything you would find in a dictionary would be too weak. Instead, you might want to consider using a phrase for a password, ideally something that is easy to remember but wouldn’t exist in normal conversation, eg:Bunnies drink water in October.
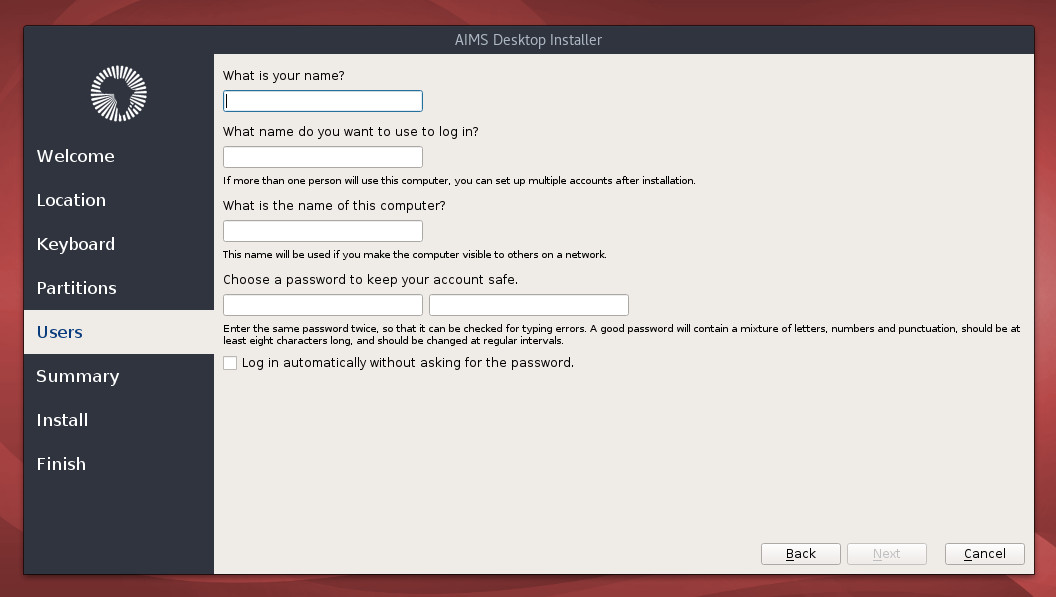 User setup screen
Before the installer starts making changes to your system, it will present a summary where you can review the changes it will make. It’s a good idea to look at least at the partitioning summary, especially if you want to keep an existing system installed as well.
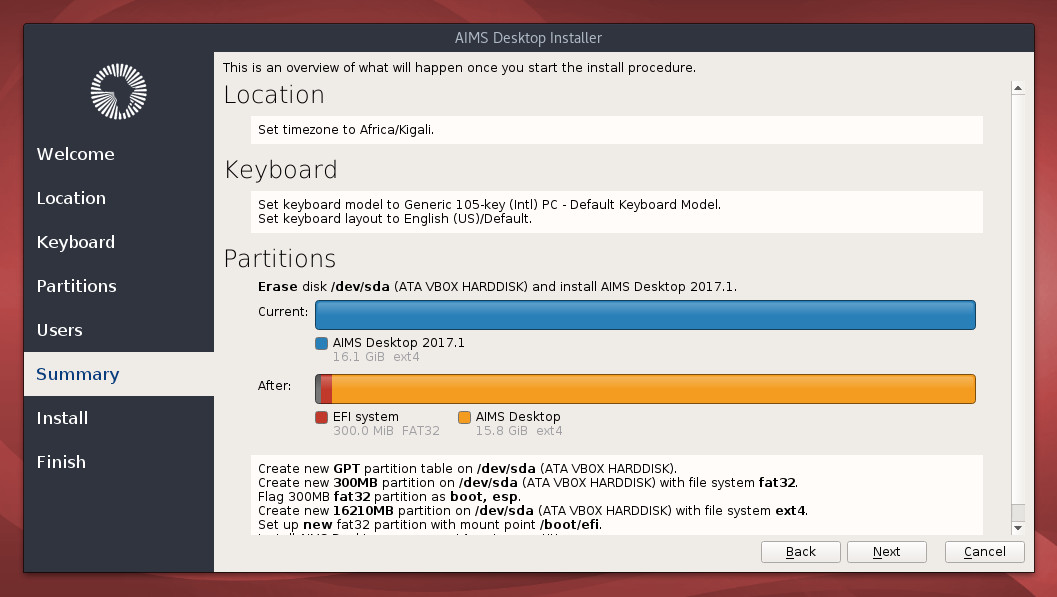 Summary of installer actions about to take place
When you’re ready, click next to proceed with the installation.
Remember to plug in
If you’re installing on a laptop device and haven’t yet connected it to a power source, then it is highly recommended you do so before continuing.
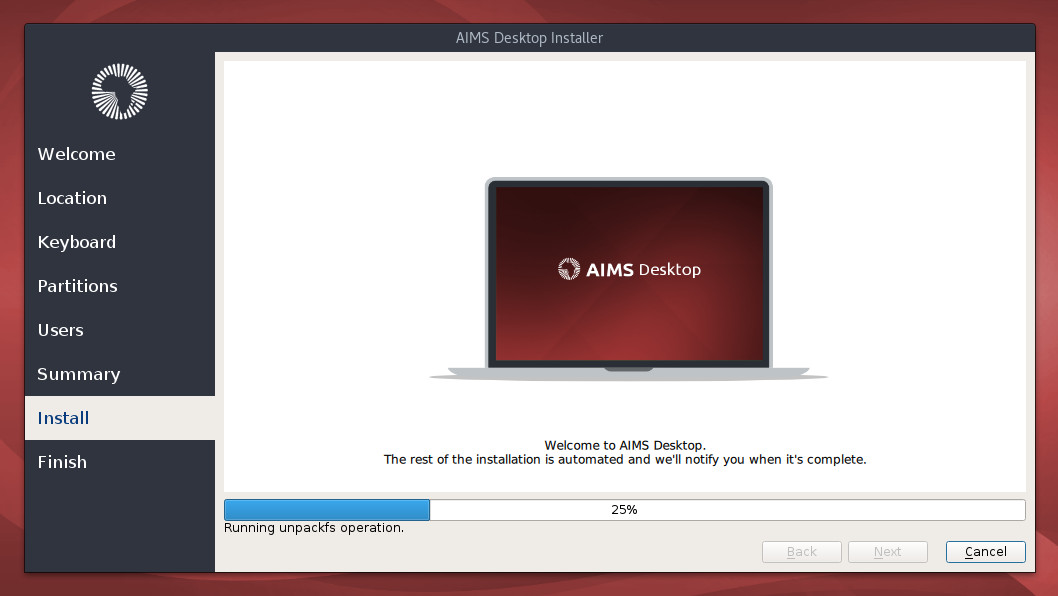 Installation progress
The rest of the installation is automated. On a fast computer, will take around 10 minutes to complete. On a slower computer, it might take as much as an hour.